
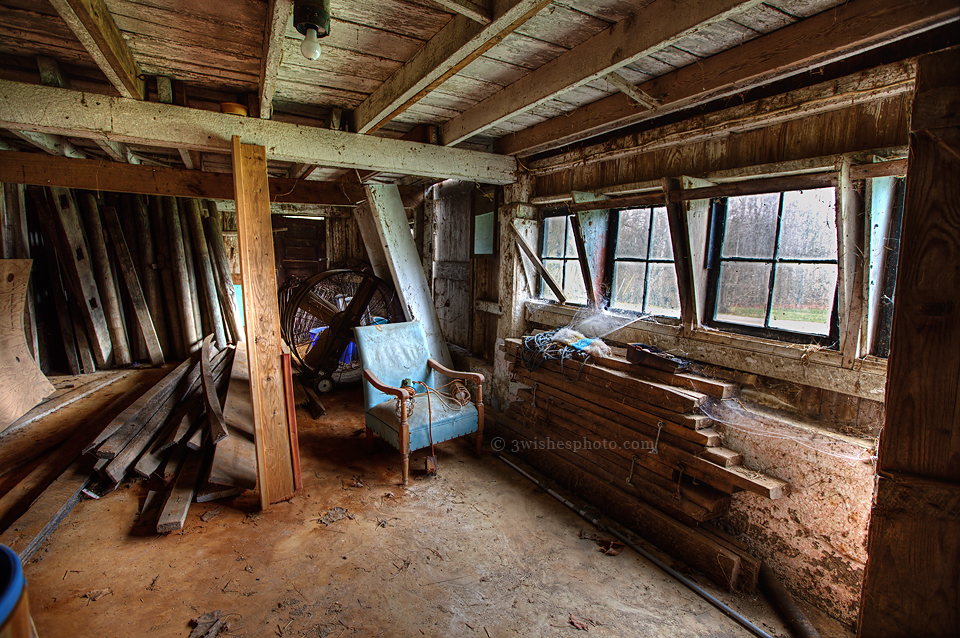
I live in the midwest so there is no shortage of rustic barns around here. They are a dime a dozen. But the moment I saw this room in my neighbor’s old barn, I knew it would make a really cool HDR image. The light in there is amazing. Even on this heavily overcast, gray day the light still pours into the room through the old windows illuminating everything in a rusty-colored glow. You’ve heard the phrase “the picture doesn’t do it justice”…well, it’s true. Our eyes are much more capable of seeing all of the variations of light and shadows of the total image than a camera click is able to capture. But…if you were to take multiple images with varying exposures and then stack them, it would be much closer to how it really looks to be there. That’s what HDR (High Dynamic Range) imagery is all about. The final image you see below was not a single exposure from my camera. It is in fact SIX different images with varying exposures with the intention of capturing all of the details the room has to offer that a single shot can’t deliver. Here’s how I did it:
I set up my tripod backed up to a wall in the room. Using my wide angle zoom lens (the Canon 16-35L) I set it fully zoomed out at 16mm in order to capture as much of the room as possible. Then I set up the timer so that I could eliminate any camera shake from pressing the shutter as it is very important for stacked images to be as identical as possible. (Had I remembered to take my remote shutter release, that would have also worked well.) Next I set my aperture to f4 and then exposed for the brightest part of the image, which is the windows. Once I knew what my shutter speed needed to be to correctly expose them (1/30 of a second), I moved on to the other extreme; the darkest corner of the scene (which is on the left where all that wood is vertically stacked). Of course the shutter speed needed to properly expose them would be much slower than for the windows in order to allow more time for ambient light to make it’s way into my lens; one full second to be exact. Now I had the fastest and the slowest exposures to properly light the extremes of the image. All that remained was to set the in between exposures to make sure the middle of the scene was lit with the right amount of light for all the details in the room. I chose to set those in even increments between the 1/30 second and the full second… 1/15, 1/8, 1/4, 1/2. Now I have the 6 total exposure settings needed to draw out the details in this unevenly lit room. (I could have used even more and gotten possibly better results OR I could have used less but some parts would have still been too dark or too bright)
Once I had my images, I loaded them into a program called Photomatix Pro. It is specifically designed for combining multiple exposures to produce a single HDR image. The software looks at each of the images and picked out the best pieces of each one to produce a more evenly lit final image. There are other HDR programs out there…this is just the one I have. I don’t use it often and am really not that familiar with how to use it efficiently. I pretty much just played with the settings until I got the effect I liked and then saved it and pulled it into photoshop. The photoshop step is not necessary. Once it comes out of Photomatix, it is in fact an HDR image that can be called finished…but I wanted to add a few edits of my own to further bring out the colors and details. And there you have it…an image that is almost exactly what my eyes saw that a single photo could not capture! Really cool…right?!!
The 6 original jpgs are included below so you can see what I worked with.
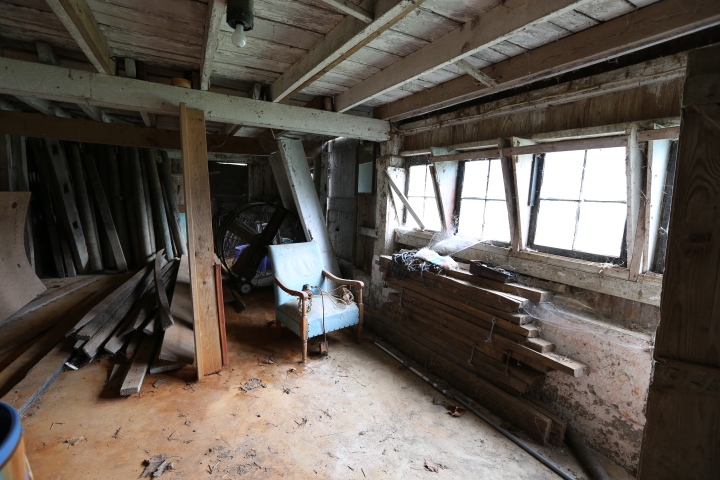
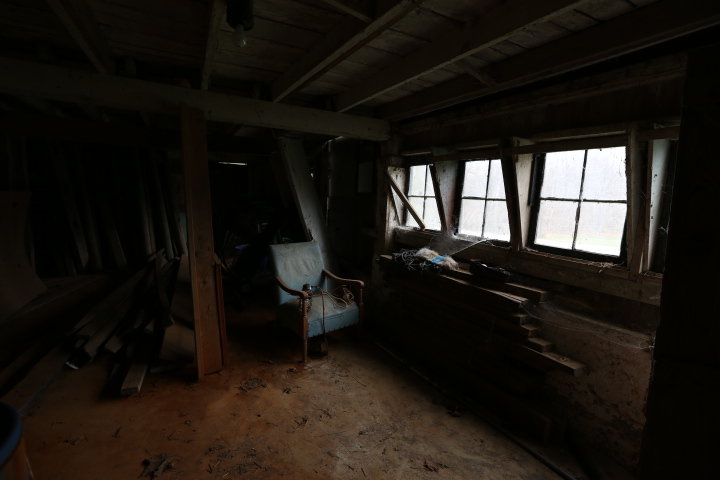
This the slowest exposure of the bunch…the one I set to light the darkest corner. It was a full second exposure. Notice how the windows are so bright that all detail is lost and they appear just white. Also notice how the floor is too bright and lacking the details you can see above. The chair too is overexposed. All expected since the camera can not expose them AND the dark corners correctly at the same time.
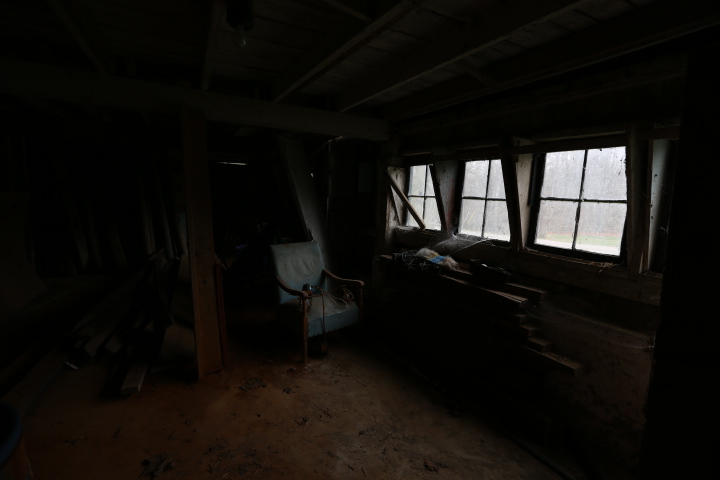
In this exposure, you can see that the chair and floor already have more detail showing through but that in turn, the dark corners are now too dark .
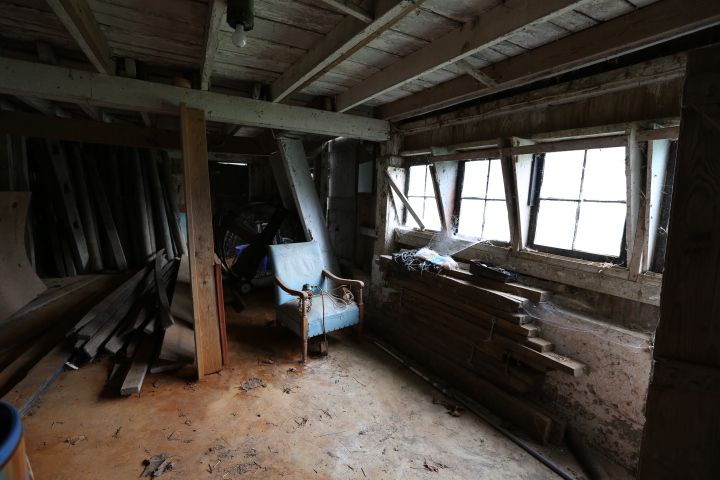
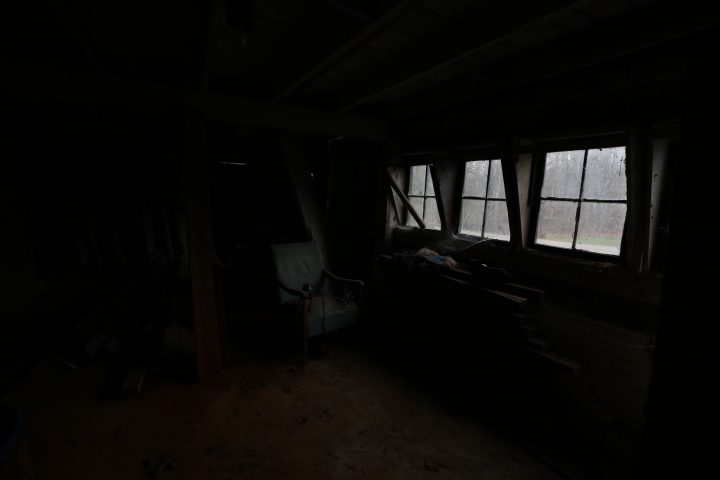
Now the chair and floor look pretty good but the windows are still much too bright and the dark corners continue to loose detail as they get darker as well.
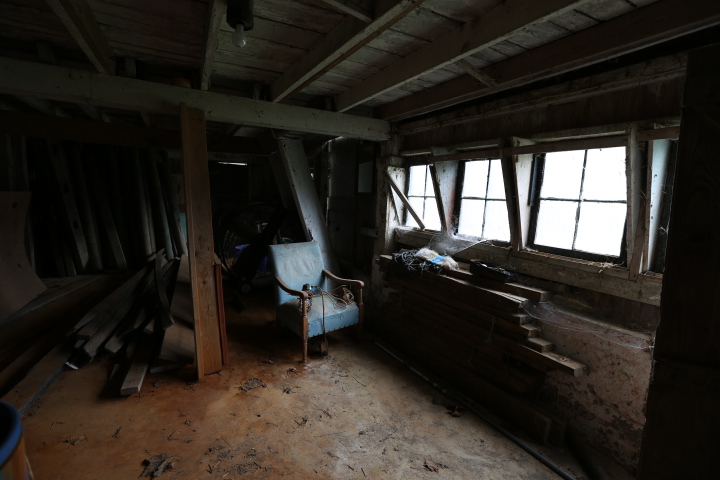
Even more rich detail is seen in the floor now.
This one was possibly not even needed but it didn’t hurt to include it as the software decides if there is anything useful in it that wasn’t already found in the other images.
And here we finally see what is outside of those windows instead of just seeing pure bright white! Now we have captured the whole range of lighting in the room.
Summary of the technicals:
- Canon 5D MarkIII camera body
- Canon 16-35iiL lens at 16mm
- ISO 100
- aperture f4
- shutter speeds from 1 second to 1/30th of a second (6 total)
- tripod and 10 second timer used for each shot in order to keep alignment as perfect as possible
- Photomatix Pro software for HDR processing
- Photoshop CS4 for further adjustments to contrast and color